Tag Archives: bake

Bake: Maple and Pecan Madeleines

vintage bakeware

Three weeks ago B and I headed over to Nottingham with Janet to meet up with Laura and spend the afternoon exploring Nottingham.

Blog meet ups, yes these can be a nerve-wracking experience, but we have recently found these to be one of the cheekier bonuses of writing a blog, getting to meet and hang out with our online friends in the flesh.

We had a wonderful afternoon which of course featured more than a few of our favourite activities; tea and cake, beer and (nearly) pizza, and of course a little retail therapy in some new exciting and unexplored places. Credit be to Laura’s local knowledge, we were introduced to gems such as the Treat Kitchen and ideas on paper in Cobden Chambers and of course we stopped by some of our favourite haunts, notably Hopkins – fresh off the train this was our first stop. A treasure trove of vintage and antique delights, we all came out of here with a little piece of vintage each.

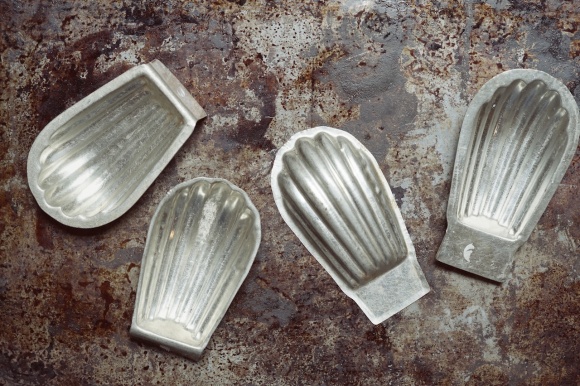
My treasure came in the form of antique Madeleine moulds and the promise to my friends of a recipe sooner or (as is the case) later, and as we are all about cosy evenings at home at the moment here’s a little recipe for rainy autumn evenings

If you can’t get your hands on vintage madeleine moulds they are also available in silicone form here

ingredients

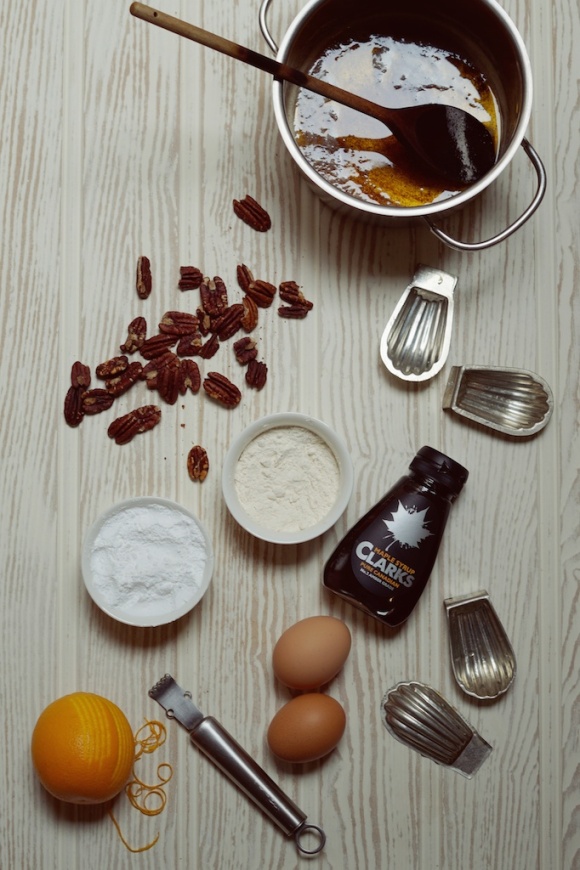
To make 14-16 Maple and Pecan Madeleines You will need……

  • 35g pecan nuts
  • 90g butter
  • 75g icing sugar
  • 35g plain flour
  • a pinch of salt
  • 2 large egg whites
  • 1 tablespoon of maple syrup
  • the zest of 1 orange

…and for the glaze

  • 30g icing sugar
  • 2 tablespoons of maple syrup

N.B. For normal madeleines replace the pecans with ground almonds, the maple syrup with honey and the orange zest with lemon zest.

Preheat oven to 160°C and toast the pecans for 5-10 minutes until golden- set aside to cool. While the nuts are toasting melt the butter in a saucepan, once melted continue to cook the butter for 4-7 minutes to a noisette- this is the stage at which the milk solids contained in the butter separate and sink to the base of the pan, these are then toasted to create nut butter. The butter is ready when it starts to froth and the milk solids at the base of the pan turn a rich hazelnut brown, the butter will also have delicious nutty smell- hence the name. Watch the butter carefully and stir continuously as it can easily go too far and burn, set the butter aside to cool to room temperature

Blitz the pecan nuts to a powder with a blender then sift these, the icing sugar, flour and salt into a bowl. Whisk in the eggs, maple syrup, orange zest and lastly the melted butter to a smooth batter. Once mixes this batter can be stored in the fridge for one day and can be frozen for three days.

flour the moulds

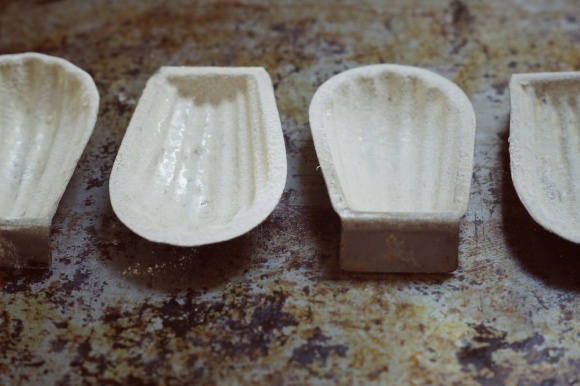
To ensure the medeleines release easily from the tin  grease the mould with a little oil or melted butter then sprinkle a handful of plain flour over the mould, shake this around in the tray so the whole of the mould is covered with flour then turn the mould upside down and tap out the excess- best to do this over the sink to minimise the mess!

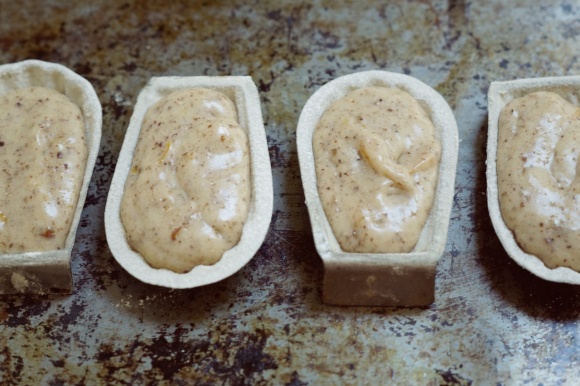
For best results make the madeleines with chilled batter. pipe or spoon the mix into the madeleine moulds and fill them almost to the top of the mould

before the oven

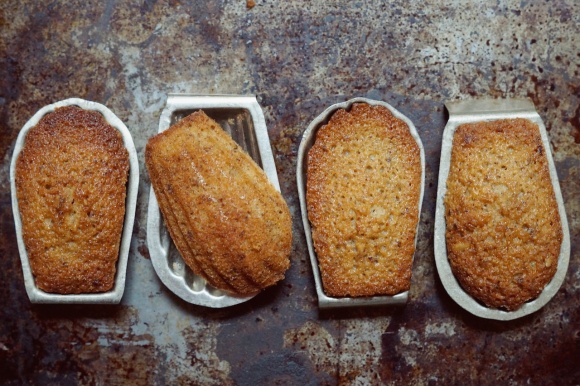
Bake the madeleines at 170°C for 14-15 minutes until they are golden brown and spring back to the touch, allow to cool slightly then turn the madeleines out of the mould onto a cooling rack

madeleine

To make the glaze combine both ingredients in a bowl and blend together to form a smooth paste. this can be spooned over the madeleines once they are turned out from the tray to give them a sheen or, as I like to, simply serve the glaze along side the madeleines and use it as a dipping sauce

madeleines

Tagged , , , , , , , ,

Bake: Passion fruit meringue pie

passionfruit meringue pie

I’m really into hibernating right now. Maybe it’s the miserable weather, or maybe a few monstrously busy weeks at work is taking its toll. Either way when the weekend hits i’ve been trying not to leave the house unless absolutely necessary. This has lead to plenty of making and baking. Weekend baking is certainly one of my favourite pastimes and if it involves sweet things then all the better. I got a little carried away with my passion fruit curd making and found myself with a little left over. This recipe makes 4 small individual tarts, I used four 8cm tins but this recipe would also work in a larger 15cm round cake tin. The good news is that they freeze, so if you’re planning a meal for two you can pop the other two finished desserts into the freezer for a later date.

They look pretty fancy too, here’s what you will need…..

For the Pastry:

  • 120g plain flour
  • 60g butter
  • 40g cater sugar
  • 1 egg yolk

For the filling:

1 jar of passion fruit curd

For the Itallian meringue topping:

  • 2 egg whites
  • 120g caster sugar
  • roughly 60 ml water
  • a sugar thermometer

lining pastry cases

Begin by making the pastry. Using a handheld mixer or Kitchen aid with beater attachment cream together the butter and sugar until smooth, pale and the grain of the sugar is no longer visible. Add the egg yolk and blend to a smooth light batter. Scrape down the sides of the bowl during mixing if necessary. Add the flour, mix briefly so the mix comes together to a light smooth dough. Wrap the dough in cling film and place in the fridge for 25-30 minutes to relax. in the meantime pre-heat your oven to 160°C ready to blind bake the pastry

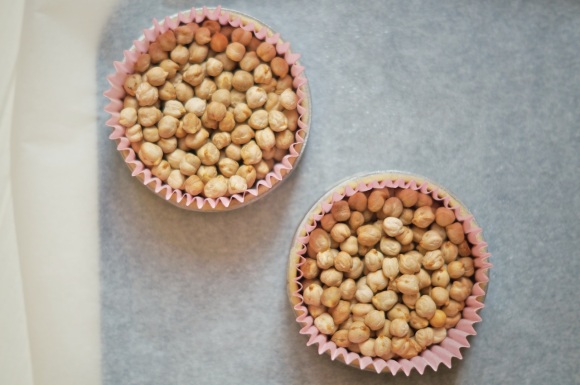
Once the pastry is cool roll the pastry out and line the tins. I like to roll my pastry out to a thickness of around 3mm, line the tins and cut off the excess pastry. Place some silicone paper into the lined tins then pour in baking beans to fill the tart cases. You need enough beans to fill the entire case so the pastry is held in place, this will prevent the pastry from shrinking. For little tarts I like to use paper cupcake cases to line the tin, I use dried chickpeas rather than ceramic baking beans, they are a little cheaper and work just as well, you can re-use them quite a few times also.

Bake the little cases for 25-30 minutes until they are a light golden brown in colour then allow to cool completely before removing the beans.

If you have any pastry left over pop it in the freezer and it will keep for up to 3 months.

kithcen aid

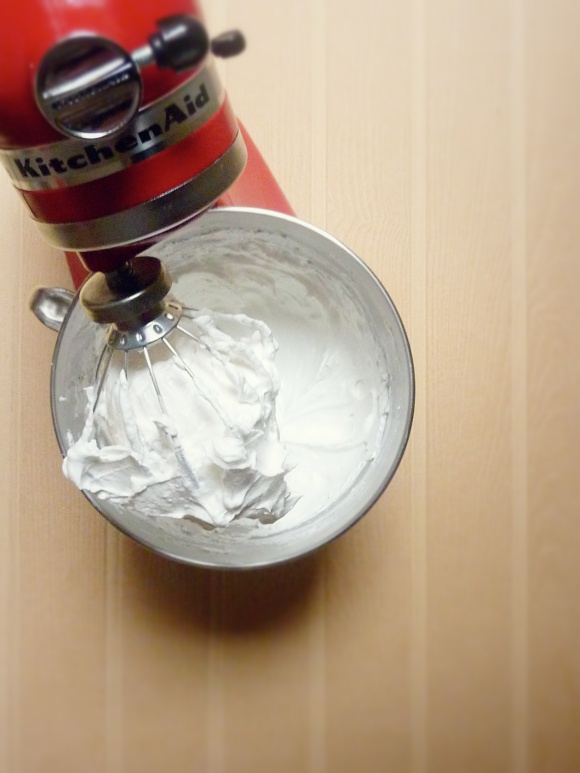
For the Italian meringue begin by placing the sugar into a saucepan then slowly pour in the water so the sugar is just covered. Place the thermometer into the pan and heat the sugar so it comes to a rolling boil. Meanwhile separate the eggs, place the whites into the bowl of an electric mixer or into a mixing bowl with a hand held mixer. The yolks can be kept in the fridge for up to 2-3 days, depending on the age of the egg. Save them to make a creme brûlée or custard based pudding at a later date. Whisk the egg whites to a soft peak whilst the sugar comes up to temperature. Heat the sugar to a temperature of 116-118°C – soft ball. Re-whisk the egg whites, this time to a stiff peak, slowly pour the sugar mixture in a steady stream down the side of the bowl into the egg mixture. Once all the sugar is added continue to whip the mixture until it is cool. The meringue should be a soft, billowy marshmallow consistency.

Set the meringue aside whilst assembling the tarts.

filling the cases

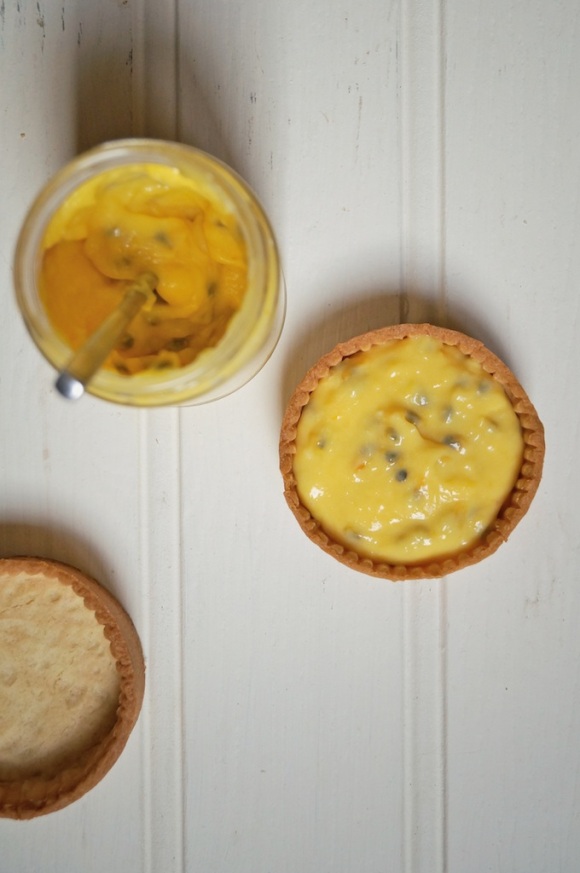
Spoon the passion fruit curd into the pastry cases so they are around 3/4 full. Pipe or spoon over the meringue mixture so the passionfruit curd is completely covered. Toast the meringue with a blow torch or under a hot grill for a couple of minutes, allow to cool and the pies are ready to serve.

passion fruit meringue pieeat pie

What have you been baking recently?

Tagged , , , , , , , ,

day 14: Workspace

E's workspaceA little peek inside my kitchen

This picture was taken in the summer on an extremely warm day. I was making Swiss Meringue buttercream for a cupcake topping and some shortbread biscuits on sticks, all in a bit of a rush as they were both prepared for a friend’s baby shower later that day whilst I was feeling a little tired and emotional after a night at the pub the evening before!

ingredients

My kitchen is my favourite space to relax and be creative in. My boyfriend C is a chef and shares my passion for cooking so the kitchen really is the centre of our home. When we come home from work we take it in turns to cook for each other and on weekends, if we have a little time, we like to bake.

All the recipes I post here are created in my kitchen and taste tested by friends and family. I have my fair share of disasters but thats all part of the creative process, when things go wrong I learn from them and start again!

washing up


Tagged , , , ,

Day 2: Something you made, Ginger Parkin

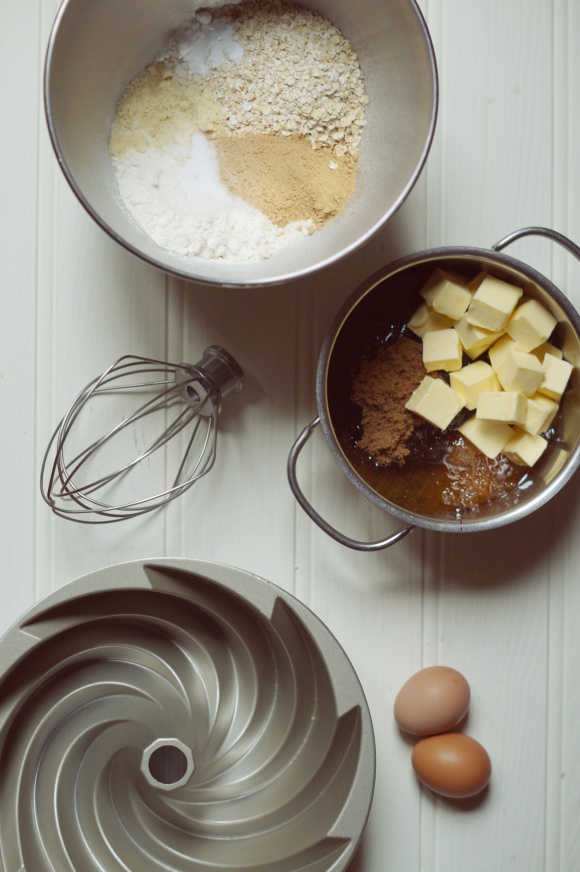
Ginger Parkin ingredients

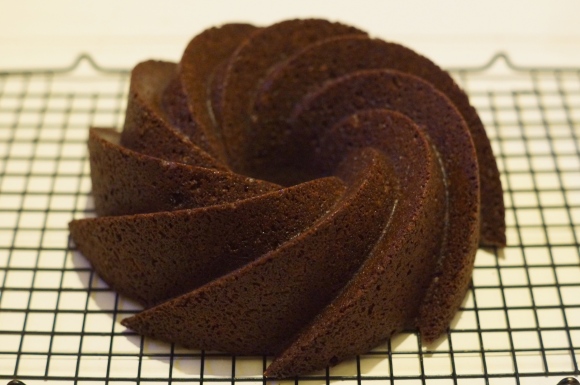
I’m off to a bonfire party this evening at my friend catherine’s house, so of course I had to bake her a catherine wheel cake. I’ve made a ginger parkin in my favourite nordic wear cake tin which i’ve used before for a Clandestine cake club bake, i’ve also added a little sparkle for extra drama.

This is a really moist sticky ginger cake with a big kick of ginger. You can’t beat a good ginger cake, for me there needs to be a lot of ginger, especially at this time of year when it’s cold. I’m including fresh ginger in this recipe for extra warmth as it’s looking likely to be a wet and windy evening!

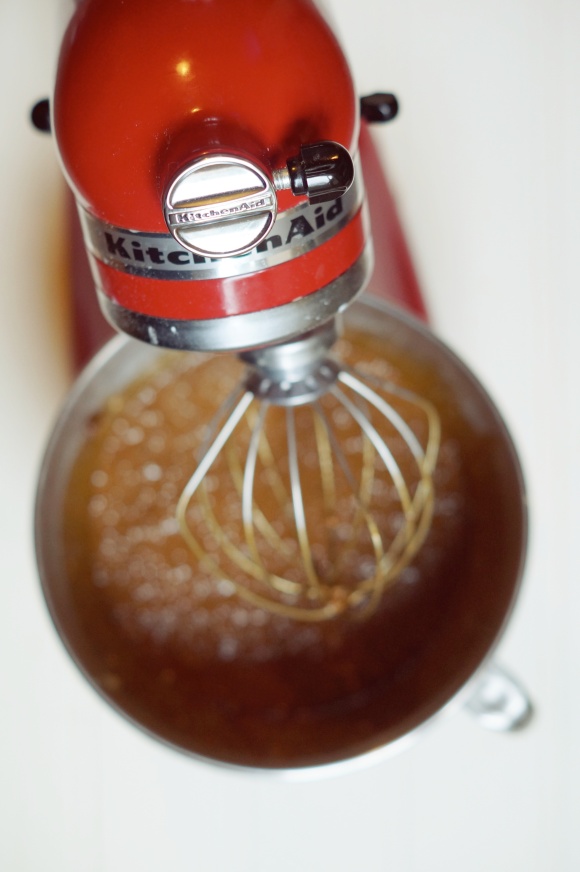
I made mine in a kitchen aid mixer but this is sheer laziness and the cake could just as easily be made by hand with a mixing bowl and hand whisk

Here’s how to make it:

  • 200g unsalted butter
  • 135g black treacle
  • 135g golden syrup
  • 240g dark brown sugar
  • 125g self raising flour
  • 125g porridge oats
  • 1/2 a tsp of bicarbonate of soda
  • 15g ground ginger
  • a pinch of salt
  • 50ml whole milk
  • 2 eggs
  • 30g of stem ginger in syrup finely chopped
  • 10g of fresh ginger
  • the juice of 1 lime

ginger parkin mix

Pre-heat the oven to 140°C. Grease the cake tin liberally with melted butter to ensure an easy release after baking. Melt the butter, brown sugar, golden syrup, black treacle and butter together over a gentle heat in a heavy based saucepan. Once all the butter is melted and you have a thick sticky liquid take the pan of the heat and set aside to cool a little.

to prepare the fresh ginger peel off the skin with a knife or a vegetable peeler and chop finely. Place the diced fresh ginger and lime juice into a measuring jug and blend to a puree with a stick blender, set this aside to add later.

Place the flour, oats, ground ginger, salt and bicarbonate of soda into a mixing bowl then place the milk and eggs into a measuring jug and beat with a fork to combine. Add the cooled  syrup mixture to the flour and oats and whisk together, then gently pour in the egg and milk mixture, whisking as you go to incorporate the egg mix. Finally fold in the ginger puree and chopped stem ginger. Pour the mix into the prepared cake tin and place onto the middle rack of the preheat oven. Bake for 50-60 minutes or until a skewer inverted into the centre of the cake comes out clean.

ginger parkin

Allow the cake to cool slightly then invert onto a cooling rack and allow to cool completely. When ready to serve transfer to a serving dish or cake board, indoor sparklers are optional!

catherine wheel cake

Tagged , , , , , , , , , , , , ,

Watch: The Mikado, with a picnic

the mikado by Illyria-cast

A few weeks ago C, my Mum, my Dad and me went to see an outdoor performance of Gilbert and Sullivan’s the Mikado by Illyria at DeMontfort Hall in Leicester. We sat in the grounds with a picnic and wine whilst enjoying the performance, a beautiful day. Illyria are a lively outdoor touring theatre company and the Mikado a family favourite of ours. This was my mother birthday present, my Dad new the words to most of the songs (ish!) so it was just brilliant to enjoy the performance as a family.

in the grounds at Demontfort hall

program

Although set in Japan this is a very British comedy, and a parody of british politics and values. The play is set in the town of Titipu where flirting has been banned, as ruled by the Mikado, king of Japan. The penalty for breaking this law is death by beheading. Needless to say general chaos ensues, largely created by those in charge of the town terrified of upsetting the Mikado and loosing their own lives. It’s a clever if slightly ridiculous plot and well worth tacking down a performance near you to learn more.

Of course we took a picnic that involved a little bit of baking….

char grilled veg

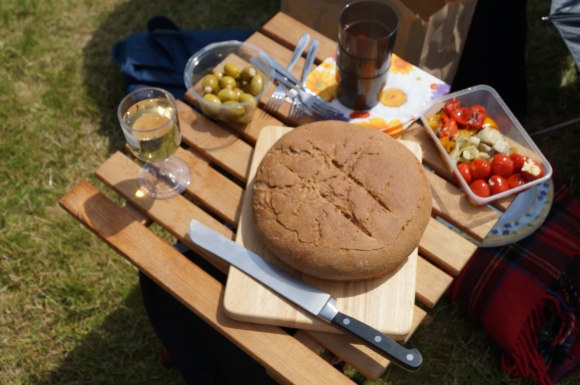
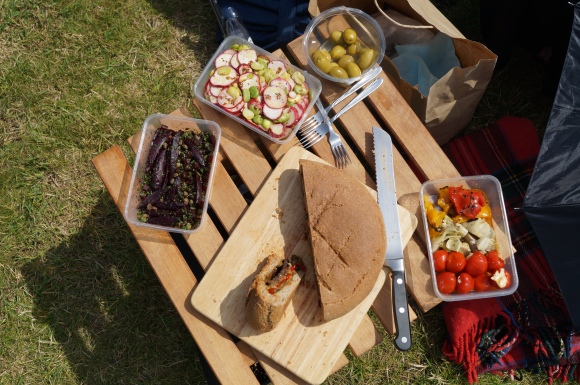
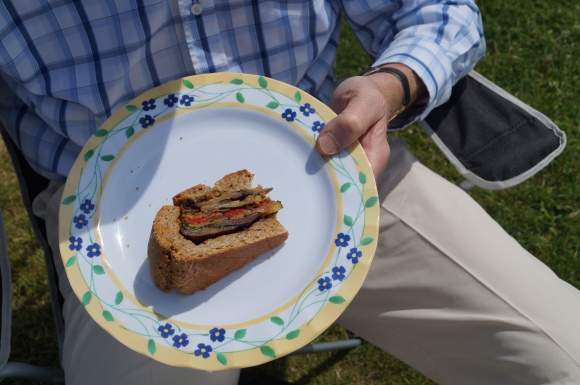
We decided to make a picnic sandwich loaf, a simple but rewarding recipe. It looks underwhelming at first glance but once cut it’s a pretty impressive sandwich. All it needs to accompany it on a picnic is a bread board and knife.

We baked our own loaf (Plans had been made for a sourdough loaf but due to an unfortunate accident with our sourdough culture, a rye flour loaf had to suffice) A shop bought sourdough loaf or a rustic seeded loaf would work just as well and would make this recipe all the easier to prepare. Filling wise, anything goes really, as long as the ingredients are layered so they are visible once cut.

Here’s how we made ours…..

For the filling:

  • 2 corgettes
  • 2 peppers
  • 1 aubergine
  • 200g parma ham
  • 2 cloves of crushed garlic
  • the zest and juice of 1 lemon
  • A few sprigs of thyme
  • salt and pepper to taste
  • a good slug of olive oil

The day before the picnic prepare the vegetables. Quarter the peppers, slice the aubergines and courgettes lengthways into thin strips. Make a dressing by placing the crushed garlic, lemon zest, lemon juice, oil and thyme into a large mixing bowl, whisk well to combine and set aside. Grill the vegetables either on the barbecue, in the oven or on a griddle pan until charred and cooked through. Place the cooked vegetables into the mixing bowl with the dressing. Season to taste and mix all together so the vegetables are well coated in the dressing, then set aside to cool.

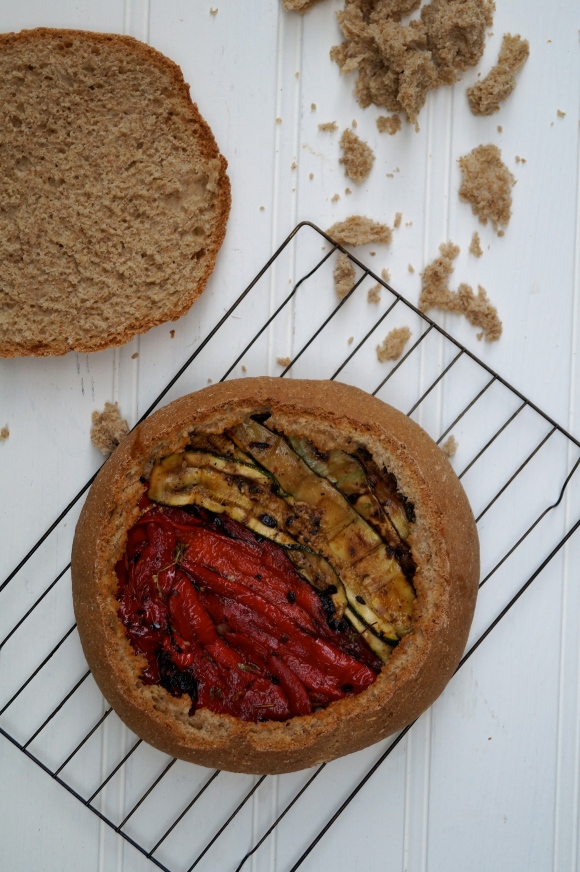
Slice the top off the loaf of bread and hollow out the centre. Place the cooled grilled vegetables into the loaf neatly in layers starting with pepper, then courgette, aubergine and parma ham.

Once well filled place the lid back onto the loaf and wrap tightly in cling film. Place the loaf into the fridge, with a weight on top to pack the layers down, into the loaf. Leave the loaf in the fridge for minimum 12 hours.

And it’s that simple, made a day in advance the loaf is packed and ready for a picnic the next day.

filled loafpicnic tablecut loafserved loaffinal actsushi at little tokyo

If we had been really clever we would have made a sushi picnic! Sadly we only thought of this as we turned to go home, but Sushi at our favourite restaurant little Tokyo was a fitting end to the day.

Tagged , , , , , , , , , , , , ,